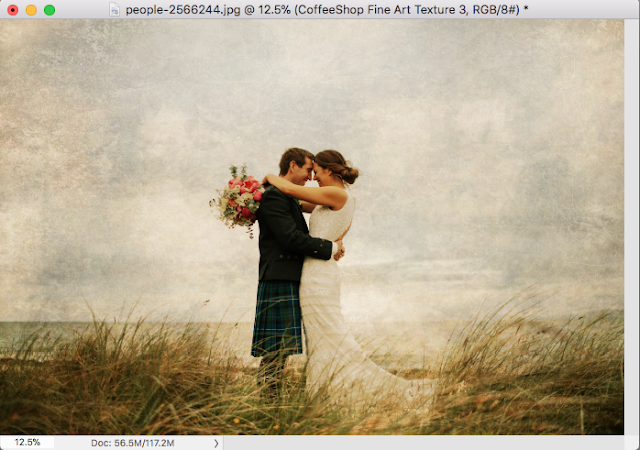
I love using fine art textures on my images. And since I am getting back to my roots and taking more "real" photos and editing them to display on my walls, I wanted to share my favorite way to remove texture from skin (or anywhere else) without removing the color tint/contrast added by the texture.
I am using this lovely photo and one of my favorite fine art textures for my tutorial below. You can download both if you want to do this tutorial with me! If you want to get all of my favorite professional fine art textures/overlays/storyboards in one download check out my Digital Design Pack and support this blog!!!
When you add a beautiful texture to your image, you are often adding contrast and color (no action necessary!). This original image is very cool and I wanted to add some warmth and texture to brighten it up.
But beautiful fine art textures can really wreak havoc with skin as seen in the image on the left above. It can make skin so blotchy and unnatural looking.
You can always add a layer mask to the texture layer and paint the texture off the skin. But then you also remove any contrast/color added to the image by the texture and this can make the image look quite fake and off color.
Today I am going to walk you through the way I remove texture from skin without removing the color/contrast enhancements.
I added my Fine Art Texture 3 from this Texture Set.
I put the texture in Overlay blending mode.
I love everything about this edit, except the blotchy texture on the skin and dress.
I clicked on the layer with the image and used the Quick Selection Tool (W) to quickly select the couple, but you can use your own favorite selection method. Make sure you include all of the skin and dress, but don't be too worried about precision.
First I will show you what you don't want to do!
You can reverse the selection and then add it as a layer mask to the texture layer. But if you do this it also removes the extra color and contrast boost added by the texture. The original image had a cool tint, but the texture is very warm. So the skin tones in this edit look off.
If you pull back you can see how the couple looks like they have been photoshopped onto the background, and not very well! But there is an easy way to remove the texture without removing the color and contrast for a beautiful realistic edit.
Click on the layer with the image and then use your favorite selection tool to select the couple. You can add some feathering if you want.
Then click on the Texture layer to select it and go to Filter < Blur < Gaussian Blur.
Yuck, blotchy skin!
Smooth beautiful skin! Dial up the Gaussian Blur filter until you don't see any of the blotchy texture on the skin.
Doesn't it make an incredible difference?
I think that the couple's skin is a little too warm (orange) and this is another easy fix.
Add a layer mask to your texture layer and click to select it. Then grab a soft, low opacity (around 15-20%) brush and carefully paint over the skin to remove some of the warmth.
I love how this edit turned out! Now it is warm and looks like it should be hanging on a wall or on a printed card.
And remember, you can use the same technique to remove texture from anything, not only skin.
I hope you enjoyed today's tutorial! If there is something specific you would love to see me post or write a tutorial for, please leave a comment below. And I would love to see your own edits using any of my freebies on my Facebook page.
Do you want to download my favorite CoffeeShop PSE/Photoshop Actions and Lightroom Presets or Design Elements in one convenient zipped file AND help support this blog? Just click here for my action pack or here for a download of some of my most popular design elements, storyboards, and textures.
For complete info on installing all of my actions, click here.
Facebook | Instagram | Pinterest | Twitter
from The CoffeeShop Blog http://ift.tt/2GNMCZJ


No comments:
Post a Comment