As you probably know, I have hundreds and hundreds of actions on my blog, so sometimes it can be a little overwhelming to find a specific one. Or perhaps something seasonal.
So today I wanted to repost one of my favorite winter editing kits called "Winter Dreams Extreme". Heck, this is one of my favorite actions for any season. I was inspired to post this today because Tracy of
Picture Perfect Photography posted a before/after using this kit on my
Facebook page and it looks amazing. I posted her edit below in the post.
This kit includes the gorgeous "Winter Dreams Extreme" action, a realistic snow texture, and a step-by-step tutorial so you can turn any outdoor image into a winter wonderland without freezing your client or the photographer. ;-)
Read all about it below!
I live in Texas and in our part of the state we don't get snow. I remember one year we had a small freeze and I turned on the news and the weather people were excitingly zooming in on some ice on the leaves of a bush. I wish I were exaggerating, but I am being completely serious. Yes, our bushes were icy... Not the roads, just the landscaping. THE HORROR!
I am not complaining because I used to live in Dallas and I hated dealing with icy conditions. But I do love the look of snow and thanks to the magic of Photoshop I can create my own snowy portraits without the drama of real snow and freezing kids. So today I am so excited to post my newest action, snow overlay, and tutorial called "Winter Dreams Extreme".
I just took this image of Imp this week and you can see it is still pretty green here. But no problem, thanks to the magic of Photoshop!!!! Grab the Santa hat here.
Last year I released the first version,
Winter Dreams, which included a really amazing snow brush. I use this action often, but I found that for images with summer/fall colors, it really wasn't enough to make them wintery.
So I decided to make a new version that has additional layers that allow you to turn almost any spring/summer/fall image into a beautiful winter landscape. I also adjusted some of the other layers to create less contrast, more matte effect.
One of the most important parts of this edit is adding snow and there are so many ways to do this. You can use my
snow brush, add snow with my nifty
Snowy Day action, or use a snow texture. You can even create your own custom set of snow overlays by using my snow brush on a black background.
I used my
snow brush to make one snow texture that is included in the download below so you can start playing right away. :-) It takes about one minute to make a snow overlay using that brush. So fun!
In my tutorial below, I used one of the amazing free snow textures from the
Shadowhouse Creations Snow Overlay set. This set actually inspired me to write this new action. If you haven't grabbed this yet, go get over there, they are amazing! And think about leaving Jerry a donation, he has so many gorgeous photography freebies on his site. Click on the button below to be redirected to Jerry's site.
I was sent this amazing before/after from Tracy of
Picture Perfect Photography. Wow, this looks amazing! If she hadn't told me I would have assumed that the edited image had been taken in snow.
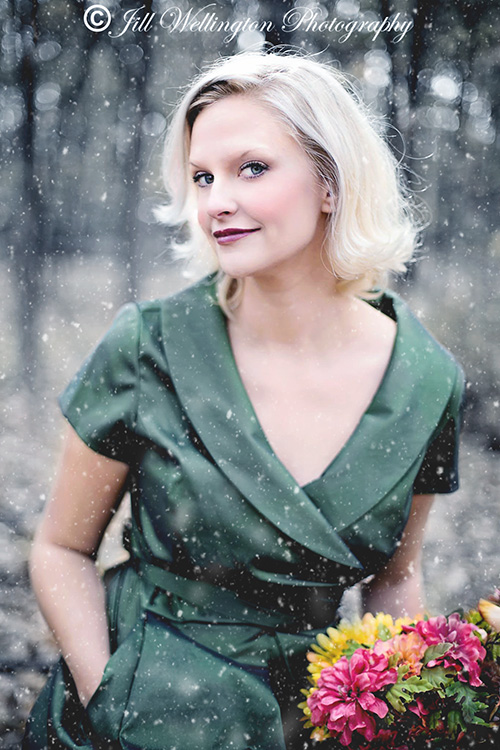
Here is another before and after example using this new action and one of the Shadowhouse Creations snow textures. This image is also from
Jill Wellington. Gorgeous, right?
CoffeeShop "Winter Dreams Extreme" Editing Tutorial:
I started with this image of Vintage Val by Jill Wellington (
Etsy Shop,
Facebook,
Blog,
YouTube Videos,
Pixabay). This image is perfection, but I wanted to show you how you can take a colorful fall image and magically turn it wintery in a minute or two.
I ran the "Winter Dreams Extreme" action on this image. This is what it looked
like with no adjustments. In some images you won't have to make any adjustments, but all of the layers are completely adjustable.
In this image, the background colors have too much green/yellow, so I turned on the "Remove Greens/Yellows" bottom layer (circled in red above).
The background is looking much better, but Vintage Val looks really washed out. Not a problem thanks to the amazing layer mask!
I grabbed a black brush set at 50% hardness, 100% opacity and clicked to select the "Remove Greens/Yellows" layer mask and painted that layer off Val.
Click Alt/Option, Shift on the layer mask to see red where you are removing that layer. Click it again to remove the red.
Much better, but I still think the background needs to be more wintery.
I turned on the "Remove Greens/Yellows 2" layer. Now the background is perfect but Val looks incredibly washed out.
You can either paint on that layer mask with a black brush, or copy the layer mask just below. To copy it, just hold Alt/Option while clicking on the layer mask below and drag it to "Remove Greens/Yellows 2". You should have two identical layer masks now. Vintage Val doesn't look frozen anymore!
Now the magic happens! Grab your favorite snow overlay and drag it on top of your image. For this example I used a snow texture from Shadowhouse Creations. I have also included one of my own snow overlays in the download below.
Put the snow overlay in Screen blending mode. I usually remove snow off faces as it would melt anyway, so I added a layer mask.
Then I used a soft black brush on the snow layer to remove the snow from her face and reduce some of it off her neck.
If you are on a computer you can hover over the image below to see the before and after.

I hope you enjoyed this new editing kit and I would love to see your own winter edits on my
Facebook page!
Download the
CoffeeShop "Winter Dreams Extreme" Editing Kit.
Do you want to download my favorite CoffeeShop PSE/Photoshop Actions and Lightroom Presets or Design Elements in one convenient zipped file AND help support this blog? Just click here for my action pack or here for a download of some of my most popular design elements, storyboards, and textures.
For complete info on installing all of my actions, click here.
More from Rita:
Facebook |Pinterest | Twitter

from The CoffeeShop Blog https://ift.tt/2BJzl4E
